This is the instruction manual for the quilt designer at quiltler.com/app/library/quilts/new — the full-screen browser studio, not the iPhone app and not the designer a fabric company puts on its own website. Read If you want to… to jump to a job. Read Rules that are not on a button before you start on the design wall. The craft of planning a quilt (size, contrast, block choice) is how to design quilts. Words such as piece, shape and block are explained in the studio glossary.
Three ways in, on purpose. This page is the reference. The first time you open the designer, a short in-app tour walks pick, recolor and save. Replay it from More → Take the tour. Video walkthroughs live under Learn in the top bar, and on quiltler.com/learn.
On this page
- If you want to…
- Rules that are not on a button
- The screen
- Open and set up
- Select, Place, Erase, Draw, Rotary cutter
- Snap, Mirror and Paste
- Picking up, moving, turning
- Putting pieces down
- The rotary cutter
- Size, grid, sashing, borders
- Colors, fabrics, shapes, blocks
- Finding pieces
- Saving, variations, the free account
- Calculator, printable pattern, More
- Keyboard
- Narrow windows
- Questions
If you want to…
Each row is one intention and the shortest path that accomplishes it. The sections below are the full behavior, including what the click will not do.
| Intention | Do this |
|---|---|
| Start a known quilt | A new quilt opens Set up a new quilt. Pick a technique, a design, then size and fabrics. Start designing. |
| Start empty | Blank quilt in the setup dialog. Default is a 60″ × 72″ throw with room for 12″ blocks. |
| Change the starter before you have edited | The bar above the quilt: Change setup or Set up a quilt. It disappears after the first undoable edit, after Hide, or once the quilt has been saved. |
| Recolor pieces already on the quilt | V Select. Click the pieces. Click a swatch in Colors or Fabrics. The header must say the picks apply to the selection. |
| Load a color and paint with it | Click a swatch while nothing is selected, or while Place, Erase, Draw or the cutter is the tool. That turns on Place. Then click the spaces you want to fill. |
| Replace one block with a classic block | Select the pieces in that space. Open Blocks, click the block. History label: Apply block. The turn of that space is kept. |
| Stamp a block into empty spaces | With nothing selected, click the block. Place turns on. Each click fills one space on the grid. Drag fills a row of spaces. |
| Fill the whole grid with what you picked | Place, then Spread → All, or AltShift5. |
| Mirror each new piece | Set Mirror before you click. The hover ghost shows every copy. Single means one copy. |
| Move pieces | Select, drag. Release snaps. Hold Alt to drop exactly. Arrow keys nudge ¼″ and ignore snap. |
| Turn or flip | R to the next 90° from 0°. ShiftR uses 45°. H flips left-right. ShiftH flips top-bottom. On Place these change the next piece, not the quilt, until you click. |
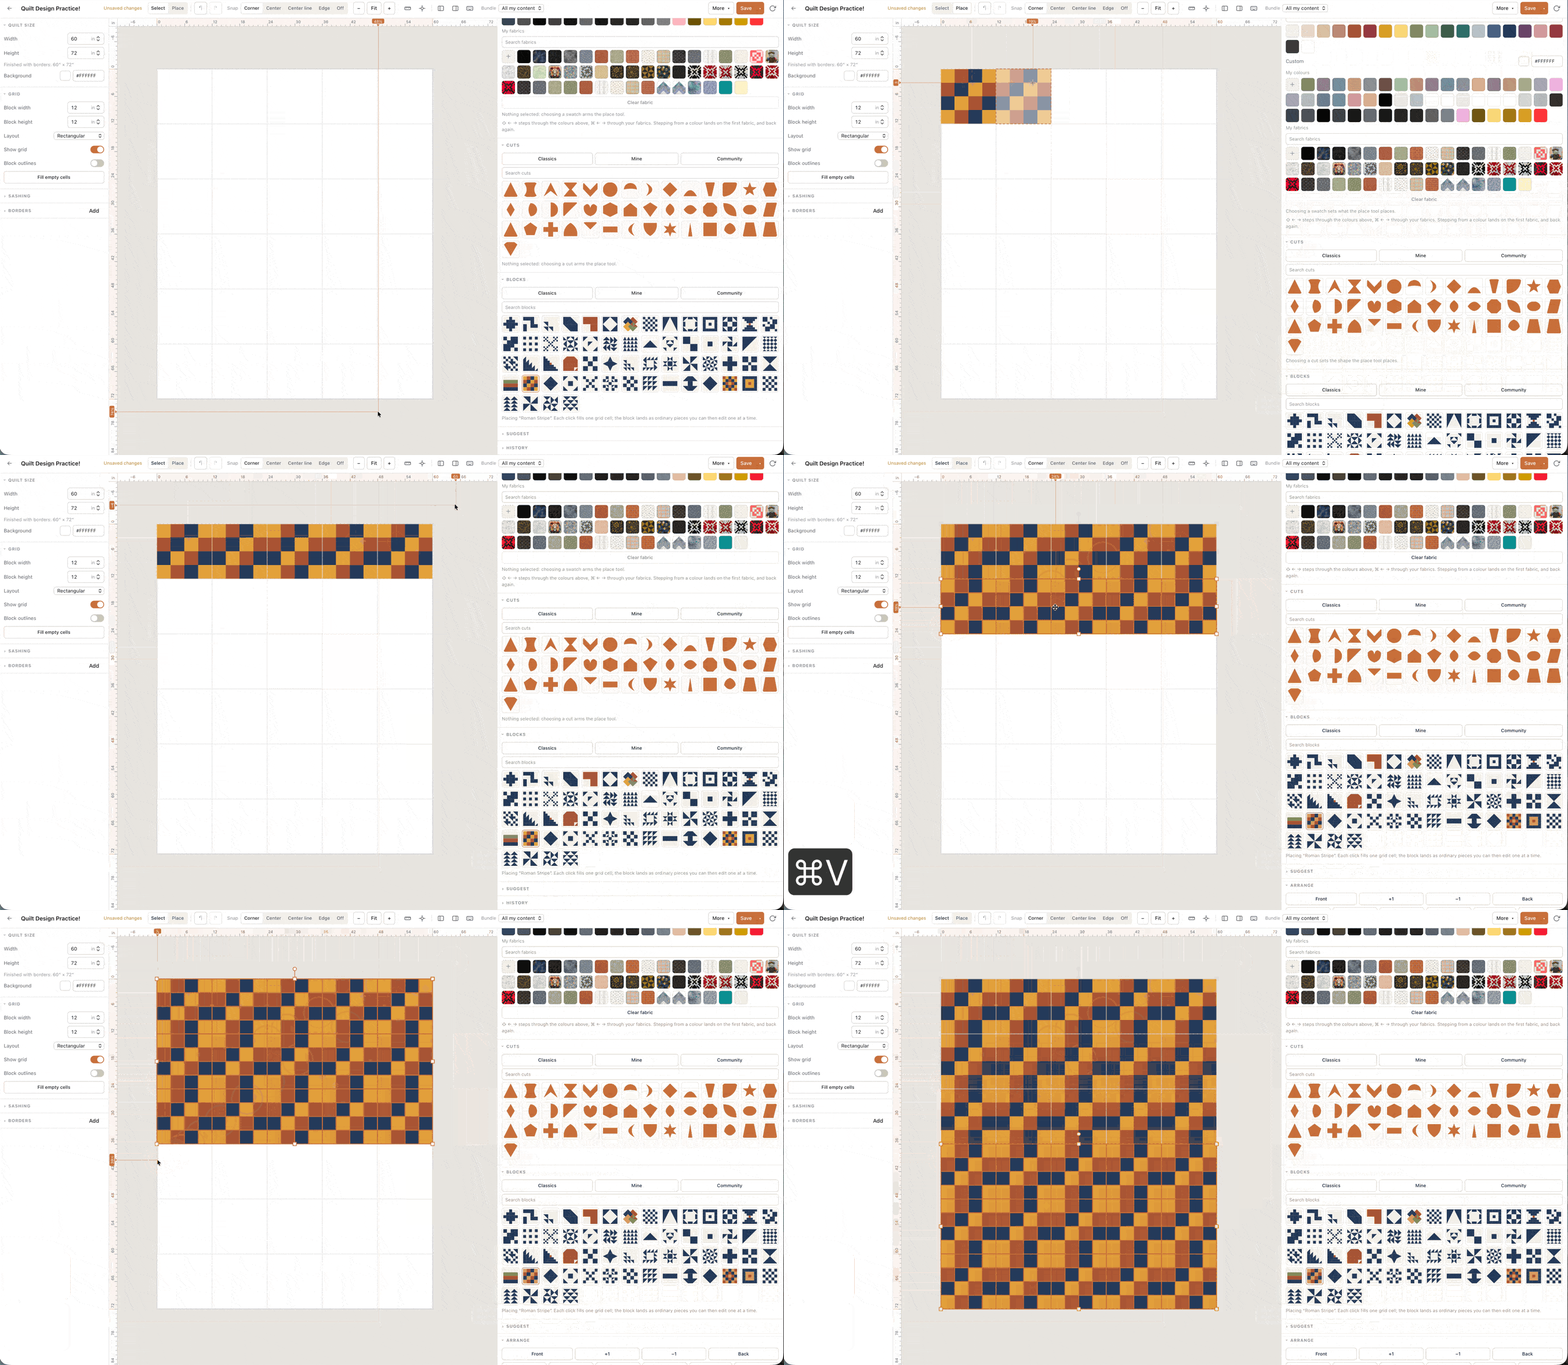
| Copy and click down elsewhere | ⌘C copies the selection (what the preview shows, not the rest of the space) and switches to Place. Click to stamp. ⌘V uses the Paste mode. |
| Erase | E. Tap the top piece, or drag. A second pass takes off the piece underneath in that spot. Undo brings them back. Erase does not copy anything, the way ⌘X does. |
| Draw a shape that is not in the shape library | D. Click corners. Click the first corner, double-click, or Enter when you have at least three. Esc throws away the corners and stays in Draw. |
| Slice pieces | K Rotary cutter. Drag a chalk mark. Finalize or Enter cuts. Clear or the first Esc throws the marks away without cutting. K again cycles the ruler. |
| Change finished size | Left panel, Quilt settings. A preset sets size and block size together. Tap an even split to change how many blocks fit without changing the quilt size. Or type width, height, block size, columns and rows. Lock a number to hold it. |
| Try pieces out beside the quilt | Quilt settings → + adds a spare design wall. It never counts toward yardage. Make this the quilt swaps it with the quilt. Remove leaves its pieces loose beside the quilt. |
| Hexagons, tumblers, diamonds | Grid → Grid shape. Sashing turns off. The Blocks group hides. Snap shrinks to Space, Outline and Off. |
| Find every piece of one fabric | Top-bar search, or ⌘F. Type, or use the empty box on the current selection and click Select all that match. |
| Recolor the whole quilt in one step | Right panel, Suggest → Recolor, pick a scheme, Apply. Photo fabrics are left alone. One undo step. |
| Scatter the fabrics already chosen | Suggest → Arrange, pick a style, Suggest. Scope is the selection if any, otherwise the quilt. |
| Remember a medallion as one pick | Select the pieces. Groups → Save group. Later, Select on that row, or find it in the top-bar search. |
| Save | Save or ⌘S. First save of a second quilt is the free-account wall (one saved quilt). Re-saving the quilt you already keep is open. |
| Keep a second colorway | Save → Save as variation, or the Variations pill. Each variation is its own saved quilt and spends the free allowance. |
| See what to buy | Fabric Calculator, or the Fabric you'll need card's Every fabric and cut. The picture is free to design. Exact yardage and the cutting chart come with Quilter, or buy this quilt's pattern ($4.99). |
| Print a pattern | More → Printable pattern — cutting & sewing. The quilt is saved first, then the pattern opens in a new tab. The quilt you are working on stays open. |
| Yardage looks far too high | More → Check overlapping pieces. Also replace stacked full squares with pieces whose shapes fit together, such as two half-square triangles. Pieces on spare design walls are left out on purpose. |
| Undo | ⌘Z. While the cutter has unmade chalk marks, undo takes back the newest mark before it touches the quilt. |
Rules that are not on a button
These are the behaviours that surprise people, because the control looks like it always does the same thing.
A swatch click is not always paint
Colors, fabrics, shapes and blocks share one rule.
- Select is on, and at least one piece is selected. The click applies to that selection. A block replaces the selected spaces. The right-panel header says the picks apply to the selection.
- Nothing is selected, or the tool is Place, Erase, Draw or the rotary cutter. The click sets what Place puts down and switches to Place. Nothing on the quilt changes until you click the quilt. The header says a pick loads Place.
- Shift-click on a shape always adds it to, or takes it out of, the shapes Place combines in one space, even when a selection exists. A plain click still applies the shape to the selection.
Dragging a swatch onto the quilt is a drop, and it does paint. The click-versus-drag distinction is why a hurried click on a color, with the selection accidentally empty, loads Place instead of recoloring the quilt.
A click grabs one piece, not the whole space
The piece under the pointer is the topmost one. If it is not already selected, the grab takes that piece and anything stitched to it — pieces joined with Stitch so they move as one assembly. Pieces that only share the same space stay put. A cream triangle on a square used to select both; it no longer does.
Shift-click, ⌘-click or Ctrl-click toggles that one piece only, not the assembly. A press on a piece that is already selected drags the whole current selection. A press on an empty part of the design wall starts a selection box; if you release without dragging, and you were not holding Shift or ⌘, the selection clears.
Escape unwinds in a fixed order
One Esc does the first of these that applies, and stops:
- Close an open menu or dialog. The editing shortcuts do not run while a menu is up, so Escape belongs to the menu.
- Stop reframing an overlay.
- Stop moving a spare design wall.
- Throw away a half-drawn shape's corners, and stay in Draw.
- Throw away a half-made Grid shape on the cutter, then unmade chalk marks, then the cutter's picked pieces. Each is its own press. The tool stays the rotary cutter.
- Leave Place, Erase, Draw or the cutter and return to Select.
- Clear the selection.
Shift and the arrow keys are overloaded
- Arrows nudge the selection ¼″, and they ignore snap.
- Shift plus up or down nudges a full inch.
- Shift plus left or right does not nudge. It steps through color swatches. Hold Alt as well if you wanted the inch nudge sideways.
- Alt plus arrows nudges ¹⁄₂₀″ (0.05″).
- ⌘ plus left or right steps through fabrics.
- With nothing selected, arrows pan the view. Space plus arrows always pans, even with a selection.
- While an overlay is being reframed, or a spare design wall is being moved, arrows move that instead of the pieces.
Shortcuts are silent in the wrong place
They do nothing while the caret is in a text field, a menu, or a dialog. The exception is ⌘F from the title field, which still focuses the quilt search. On Windows and Chromebook, read Ctrl wherever this page says ⌘. A design key pressed while a spare design wall is mid-move raises a reminder to finish the move, and does not cut, place or delete.
What counts as the quilt
Yardage, the printable pattern and downloaded pictures count a piece when its center is on the quilt. The space around the quilt is a shelf. Spare design walls parked there are for trying things out: piece and slice there, then Make this the quilt if one of them should become the quilt. Pieces on a spare design wall, and loose pieces around the quilt, are left out of the shopping list on purpose. Overlapping pieces on the quilt are counted twice. More → Check overlapping pieces selects them; it does not delete them. Half-square triangles that fill a square together are not overlaps.
Copy switches tools
⌘C copies the selection and loads Place, so the next click stamps the copy. ⌘X copies and deletes. ⌘V pastes with the current Paste mode, then the clipboard becomes the thing you just pasted, so a second paste walks forward instead of stacking on the same space. ⌘D duplicates in place and leaves the tool alone.
The screen
The designer is full-bleed. Five places hold everything.
| Where | What it is for |
|---|---|
| Top bar | Logo (leave), title, plan, save status, Variations, undo/redo, search across this quilt, chat, Learn, Fabric Calculator, More, Save, refresh library, account. |
| Left panel | The quilt as an object: Quilt settings, Grid, Sashing, Borders, Overlays, Quilting, Controls. Ruler, Guides, Sizes, the shortcut sheet and Designer v… are pinned at the bottom. |
| Design wall | The quilt, in inches, plus the space around it. Scroll to pan. Pinch, or hold ⌘ while scrolling, to zoom. Space-drag pans. Middle-button drag pans. |
| Right panel | Palette (colors, fabrics, shapes, blocks), Suggest, Groups, History. Shortlist and Animations are pinned at the bottom. |
| Bar under the quilt | The stroke in hand. Left: Select, Place, Erase, Draw, Rotary cutter, then Snap, Mirror, Paste. Middle: the next piece Place puts down, the cutter, or the selection. Right: zoom. |
The logo leaves the designer. Signed-in, it goes to the studio home; signed-out, to the community. If you have undoable unsaved edits, it asks before leaving. ⌘-click still opens a new tab and keeps the designer open. The footer of the left panel shows Designer v…. A screenshot for support should include that number.
While you are reframing an overlay or moving a spare design wall, the tool dock hides. The bar tells you what you are moving and offers Done.
Open and set up
You need a current browser: Chrome, Safari, Firefox or Edge. A Chromebook is fine. Nothing installs.
- A new quilt: /app/library/quilts/new.
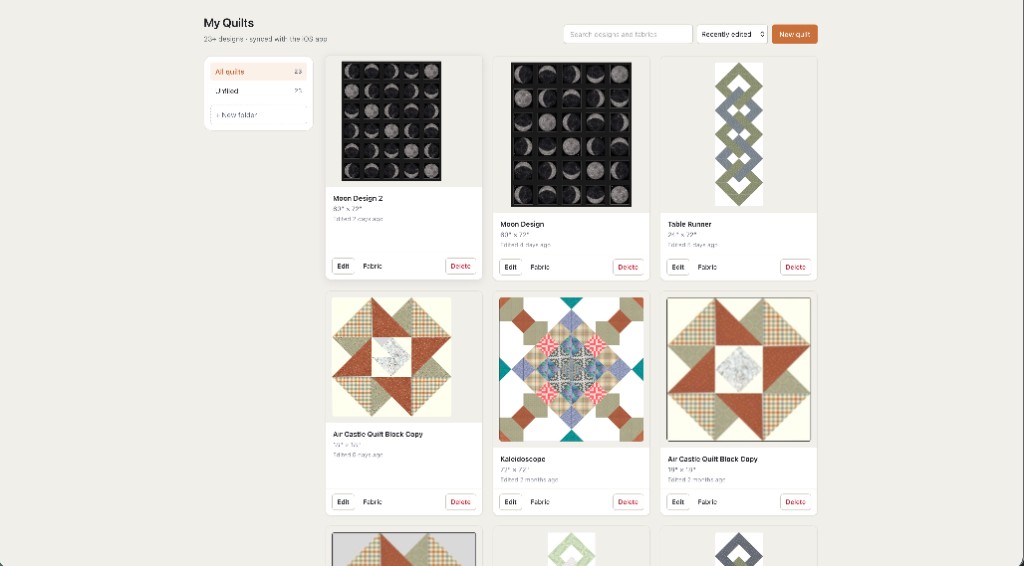
- A quilt you already saved: My Quilts, then the design.
- From the studio home: quiltler.com/app → Design a quilt.
You do not have to sign in to start. The design wall, the setup designs, the color palette and undo all work as a guest. Closing the tab without saving loses the work, with one safety net under Saving.
Set up a new quilt
A new design opens the dialog Set up a new quilt before the quilt is yours to edit. Three steps. Back returns. Blank quilt skips the gallery and opens the empty throw. Start designing commits the preview. The afterword on the last step is the promise: everything here can be changed later in the Layout panel.
| Step | Title | What you are choosing |
|---|---|---|
| 1 of 3 | What do you want to make? | Squares & strips — rotary-cut squares and bars, no triangles. Pieced blocks — stars, geese and dashes, one block per square, sewn by foundation paper piecing or templates. English paper piecing — hexagons, diamonds and tumblers, sized by the side of the piece. |
| 2 of 3 | Pick a design | A named layout. The preview is the real painter, not a photograph. On English paper piecing, Start from a photo turns a JPG or PNG into flat-colored pieces. |
| 3 of 3 | Size, finishing and fabrics | Bed size or, for a jelly roll, the roll you have. Sashing, borders and on-point where that design allows them. Fabrics from the starter palette. |
Some arrivals see Start a quilt first: Open this quilt, Set one up step by step, or Blank quilt. That is a welcome, not a different designer.
After you land, a bar sits above the quilt while the design is still new and you have not made an undoable edit. It names what you started from, and offers Change setup or, on a blank quilt, Set up a quilt. Hide dismisses it. The bar leaves on the first edit, on Hide, or once the quilt has an id. Setup replaces the whole quilt, which is why it does not stay one click away from work you have already recolored.
Designs you can start from
Each design paints a grid. Size, sashing and borders are solved first, then the painter fills the spaces. That is why one design can be a baby quilt or a king without the design itself knowing about sashing. Designs marked as refusing sashing or on-point will not offer those controls.
Squares & strips. Trip Around the World, Rail Fence, Irish Chain, Log Cabin, Bargello, Plus Quilt, Chinese Coins, Brick Path, Gingham, Postage Stamp, Disappearing Nine Patch, Nine Patch & Plain, Sunshine and Shadow, Ombré Squares, Jelly Roll Strips.
Jelly Roll Strips replaces the bed-size picker with the roll: Your roll (half, one, two or three), Strips in a roll (40 or 42), Block (4 or 5 strips), a layout the roll fills, and Border of None, One strip or Two strips. The summary counts strips used, leftovers, and what the border and binding take from the stash.
Pieced blocks. Sawtooth Stars, Ohio Stars, Flying Geese, Zigzag, Broken Dishes, Churn Dash, Shoofly, Snowball & Nine Patch, Pinwheels, Hourglasses, Jacob's Ladder, Bear Paw, Maple Leaves, Dutchman's Puzzle, Friendship Stars, Sampler, Medallion.
English paper piecing. Grandmother's Flower Garden, Hexagon Stars, Scrappy Hexagons, Hexagon Rings, Hexagon Ombré, Two-Tone Hexagons, Hexagons & Triangles, Tumbling Blocks, Thousand Pyramids, Triangle Ombré, Tumblers, Tumbler Ombré, Harlequin, Diamond Rings. Start from a photo is on this shelf. The committed design is named From your photo. Its options are the shape (polygons or a tessellation), detail, contrast, facets, edges, seams, texture, colors and color spread. A file that cannot be read says to try a JPG or PNG.
A blank quilt is 60″ × 72″ with 12″ spaces — the Throw preset. Pieced units you do not see in the gallery can still be stamped later from Blocks → Classics, or built with shapes. See quilt block designer and shapes and fabrics.
Select, Place, Erase, Draw, Rotary cutter
The five tools live under the quilt, because they belong to the stroke in hand. The group is labeled Tool. Press V, B or A, E, D, and K.
| Tool | Key | What a click on the quilt does |
|---|---|---|
| Select | V | Picks up, moves, resizes and recolors what is already there. Does not place new pieces. |
| Place | B or A | Puts the next piece down. The chips beside the tool are the fabric and the shape a click will place. Painting does not change which pieces are selected. |
| Erase | E | Takes the top piece off. A drag takes off one piece per space per pass. Undo restores. It does not use the clipboard. |
| Draw | D | Drops corners of a free shape. Three corners minimum. Close with the first corner, a double-click, or Enter. |
| Rotary cutter | K | Marks a cut. The quilt does not split until Finalize or Enter. Press K again to cycle Straight, Circle, Fan, Curve, Grid. |
When Select is on and nothing is selected, the bar says to choose Place, and offers Place pieces. When the quilt has pieces and nothing is selected, it says to click a piece or drag a box, and offers Select all.
Snap, Mirror and Paste
Three menus next to the tools. Each is set once or twice a session. The button names the current mode. The popover headings are Snap, Mirror and Paste.
Snap
Where a dropped piece locks. Hold Alt during a drag to ignore it for that gesture. In the browser, hover a mode in the menu and the preview above the list plays it: a piece dragged, let go, and clicking into place. On a square grid:
- Space corner — fills a space. A piece smaller than its space tucks into the nearest corner. This is the usual choice.
- Space center — the piece's center lands in the middle of a space, so a small piece floats centered in its square.
- Where lines cross — the piece's center lands where grid lines cross.
- Halfway along a line — the center lands halfway along a grid line, for setting triangles and on-point blocks.
- Against other pieces — butts flush against the pieces already down, wherever they are.
- Outline — pieces join along their shape's outline. Hexagons, diamonds, anything that tessellates. This one snaps live while you drag, so the ghost and the drop agree.
- Off — free placement. A Place drag across an empty part of the design wall will not smear a trail of new pieces; a click still places one.
On a shape grid the menu shrinks to Space, Outline and Off. Space means the piece lands in the space under the pointer. Other square-grid modes a design already carries are shown as Space there. Grid modes other than Shape follow the pointer and lock on release.
Mirror
Extra copies of each piece you place, reflected or turned about the quilt's center — the center of the content, not the center of the piece. The hover preview shows every copy. A copy that would land on an identical pose is skipped. Mirror does not flip a selection you already have; that is H.
- Single — one copy, no reflection.
- Left to right — reflect across the vertical center.
- Top to bottom — reflect across the horizontal center.
- Four-way — both centers, all four quadrants.
- Turn 180° — a copy rotated halfway around the center.
- Turn 90° — four copies around the center.
The same list is under Place → Transform → Position & angle.
Paste
Applies to click-to-place of a copied arrangement, and to ⌘V.
- Fit grid — keeps the copied size and snaps it to the grid under the pointer. Four squares stay four squares. It does not grow them to fill the spaces.
- Into one space — the whole copy scales into the one space under the pointer, nesting a small layout inside one square.
Picking up, moving, turning
Select is the default.
- Click the top piece. Its stitched assembly comes along if it was not already selected.
- Shift-click, ⌘-click or Ctrl-click toggles that one piece.
- Drag on an empty part of the design wall to drag a box around pieces; everything the box touches is selected. Shift or ⌘ keeps the previous selection and adds. Dragging inside a spare design wall still draws a box; the spare design wall itself is grabbed only by its name chip or the band of its frame.
- ⌘A selects every piece.
- Drag a selected piece to move the selection. Release snaps, unless Alt is held. Mid-drag, R and H turn or flip the piece in hand.
- Handles on the selection frame resize. The opposite edge stays put. Minimum size is about ¼″. Keep proportions locks the aspect. Alt skips grid snap on release. The handle above the frame rotates; Shift snaps that angle to 15°.
- Arrow keys nudge, as in the arrow rules. R / ShiftR turn. H / ShiftH flip. C / ShiftC turn the shape inside the piece, not the piece. [ moves it down one, ] up one.
The selection bar
It appears when Select is on and at least one piece is selected. The chip says 1 piece, N pieces, or N stacked when they share a footprint. Open it for All and None, and to drop pieces by Each, Fabric, Color, Shape or Rotation.
The fabric chip and the shape chip open the palette. A shared photo with no name reads Photo fabric. Several fabrics read N fabrics. No shape reads No shape.
| Control | Key | Effect |
|---|---|---|
| Rotate 90° | R | Next 90° stop measured from 0°, so 0, 90, 180, 270. Switching from Shift+R realigns to that grid instead of adding 90 onto 45. |
| Duplicate | ⌘D | Copies land on top, still selected. |
| Delete | Delete or Backspace | Removes the selection. While the cutter is picking a grid shape, Backspace takes back the last dot instead. |
| Deselect | Esc | Only after the earlier Escape jobs are done. |
| More actions | Flip, stretch or repeat a fabric print, resize, arrange, change shapes, stitch or make a quilt block. |
More actions holds:
- Rotate left 90°.
- Flip left / right (H) and Flip top / bottom (ShiftH).
- Stretch to fit and Repeat print, only when the selection has a photo fabric. Stretch to fit scales the picture to fill the piece. Repeat print repeats it at its natural size.
- Keep proportions: on or off, for the resize handles.
- Position & angle. Pivot is Whole group (turn about the selection's center) or Each piece (each about its own center; a stitched assembly still turns together). Angle can be Set to or Turn by. Picture fill is Stretch to fit or Repeat print. Print scale is how much fabric the photo shows across: set it to see the print at true size; 0 repeats it once per grid space. A number above 0 switches to Repeat print. Larger inches mean a smaller-looking print.
- Shape ↻ (C) and Remove shape, when a shape is applied. Removing the shape keeps the rectangular piece.
- Arrange: Put on top, Up one (]), Down one ([), Tuck underneath. The line-up buttons need two pieces. Space evenly needs three.
- Make quilt block, in the quilt designer, with at least two pieces that are not frames. This opens the block builder with those pieces. The right-click menu's Save as block is the same job.
- Stitch, with at least two pieces. Same-fabric pieces that touch are sewn into one. Different fabrics stay separate but move together. The button reads Sewing… while it runs.
Right-click
Right-click a selected piece and the menu acts on the whole selection. Right-click an unselected piece and it acts on that piece only. An empty spot says Nothing here.
On a piece: Duplicate, Rotate 90°, Flip horizontally, Flip vertically, Stretch to fit or Repeat print when it is a photo, Put on top, Tuck underneath, Select same fabric, Copy color code when the piece has a solid color, Select same shape, Select same rotation, Select same size, Save as block, Copy to place tool, Clear fabric, Turn shape 90°, Remove shape, Delete. Copy to place tool is ⌘C: it arms Place.
On a spare design wall's name chip: Duplicate copies it to a clear spot beside the quilt.
Putting pieces down
Place shows what the next click puts down: scope Next piece, a fabric chip, a shape chip, and, when you have loaded a block or a copy, the whole arrangement. Rotate 90° turns the next piece. Transform flips it and opens Position & angle. Shape ↻ turns the shape inside the next piece. Back to fabric clears a loaded block or copy and goes back to placing single pieces with a fabric and a shape. Spread is hidden when Place holds copied pieces.
A click places. A drag with snap on places one stamp per space. Pieces with different shapes stack — a half-square triangle on a square is two pieces, and the calculator counts both. A piece with no shape, dropped on a piece that already fills the space, replaces it rather than stacking an invisible full square. Mirror runs after each stamp.
Spread stamps the next piece across the grid from the space under the pointer. The pad is a numpad: arrows for a direction, All for every space. The keys are AltShift and a digit, read from the physical key, so they work on the number row and the numpad:
- 5 — every space. No need to hover.
- 8 2 4 6 — up, down, left, right. The pointer must be over a space.
- 7 9 1 3 — the diagonals.
Spread stamps on top of what is already there. One direction is one undo step, labeled Spread up and so on.
Draw
Click corners. They snap onto nearby outlines. One corner, then two — three make a shape. Close by clicking the first corner (within a small screen distance), double-clicking, or pressing Enter. Close shape and Clear are on the bar. The new piece uses the fabric and shape currently loaded in Place, and the outline is saved as its shape. Fewer than three corners does nothing. The first Escape clears the corners and stays in Draw; the next leaves the tool.
The rotary cutter
The cutter marks first and slices second. Chalk on the quilt is not a cut. Finalize, or Enter, makes every mark in one stroke and selects the smallest section of each slice. Clear brushes the marks off without cutting. Undo, while marks are unmade, removes the newest mark before it rewinds the design.
K picks up the cutter. K again cycles the ruler: Straight, Circle, Fan, Curve, Grid. A drag shorter than about ½″ is ignored. A click without a drag picks a piece. While pieces are picked, cuts land only on those pieces; a mark that misses them explains that it missed, and asks you to lay it across one of them or click a piece to pick it. The pick chip says Only N picked. Its ×, or Escape after the marks are gone, clears the picks.
Typed inch offsets and a circle's diameter wait on sizing access. The field placeholder reads With the pattern until you buy this quilt's pattern or have a paid plan. The blade itself is in the dock either way.
Straight
Across cuts through the region under the ruler — the quilt, a spare design wall, or a piecing. One piece cuts only the piece under the ruler. Snap for the blade, separate from the dock's Snap, is ¼″, ⅛″, Guides (free movement, but clicks catch centers, seams and 30/45/60°) or Off. Alt makes that stroke freehand. Presets on Across: Halve ↕, Halve ↔, 45°, plus an offset and At ↕ / At ↔. The surface picker is The quilt or a spare design wall's name. The reading beside the blade is an angle such as 45° and a distance from an edge.
Circle, fan, curve, grid
- Circle — pin a corner or the center, drag the ring. Alt is freehand. Presets resize the circle, center it, or fit it to the piece. Diameter is a sizing field.
- Fan — a wedge for Dresden plates. Pin a corner, an edge or the center, and drag into the piece. Blade counts are 4, 6, 8, 12, 16 and 20. Rounded top is a toggle.
- Curve — Wave or Freehand. Humps run from 1 to 8. Depth is Gentle, Medium or Deep. Flip mirrors the wave. A curve that crosses itself is refused.
- Grid — click dots. Spacing is ¼″ or ⅛″, and the dots thin out when you are zoomed away. Corners, edge middles and centers are larger landmarks. Two dots make a line; three or more make a shape. Undo dot takes back the last. Mark line or Close shape commits the chalk. Double-click closes when you have at least two dots. Start the shape on the quilt, a spare design wall or a piecing.
Finalize splits pieces, breaks groups that the blade crosses, and saves the new outlines as shapes. It does not invent stitch groups for pieces that were not already stitched. If every mark misses, nothing is cut.
Size, grid, sashing, borders
The left panel is the quilt as a physical object. Worth setting before the quilt is crowded: changing the grid later moves everything already on it. Size, grid, sashing and border numbers are part of designing, so you can type them while you are still exploring. Inch rulers, pointer guides, real size labels on pieces, and the yardage numbers are the paid reading of those same dimensions — see Calculator and the pattern.
Quilt settings
The section is Quilt settings. Measure in at the top switches between Inches and Centimeters — the same choice as Account → Measurements, so it changes every length in the app on this device. The quilt itself never changes size. Chips under it choose which grid you are editing.
- Quilt — the main quilt. Finished size, yardage and the pattern. Right-click the chip to duplicate it onto a spare design wall.
- A spare design wall's name — edits that one. Clicking its name chip on the design wall jumps here too.
- + — adds a spare design wall beside the quilt, about three by three, to try out pieces and blocks. It never counts toward yardage.
- Duplicate — copies the active grid onto a new spare design wall.
On a spare design wall: rename it, the same size fields, Move (drag it; every piece on it comes along; the button reads Moving meanwhile, and Done is on the bar under the quilt), Make this the quilt (it becomes the quilt and the old quilt moves beside it as a spare design wall; borders stay with the quilt), and Remove (the frame goes away; the pieces stay loose beside the quilt).
Presets set finished size and block size together, so the grid divides evenly. The menu label is the name, the width and the height. If the quilt matches none of them, the menu shows Custom.
| Preset | Finished size | Block | Grid |
|---|---|---|---|
| Baby | 36″ × 48″ | 4″ | 9 × 12 |
| Lap | 50″ × 65″ | 5″ | 10 × 13 |
| Throw | 60″ × 72″ | 12″ | 5 × 6 |
| Twin bed | 66″ × 90″ | 6″ | 11 × 15 |
| Queen bed | 90″ × 108″ | 6″ | 15 × 18 |
| King bed | 104″ × 104″ | 8″ | 13 × 13 |
Custom size on a square lattice is two cards, Across and Down. Each card has the quilt measurement, the block measurement, and the count (Columns or Rows). They are one fact written three ways: width is columns times block width, plus sashing when sashing is on. The lock beside a field holds that number. Lock Rows, then change the quilt height, and each block grows instead of the quilt gaining rows. Locks are for this editing session; they are not saved on the quilt. If the other two fields in a card are both locked, the third input is disabled because it is already determined.
Under each card, Even splits lists every number of columns (or rows) that divides the quilt's width (or height) into equal blocks that land on a ruler mark — whole, half or quarter inches, or whole, half or tenth centimeters. Each chip shows the count over the block size. Tap one to re-divide without changing the quilt size: a 60″ wide quilt of 5 columns becomes 10 columns of 6″ or 15 of 4″, but never 7, whose 8.57″ blocks no ruler can cut. The roundest sizes nearest the current count come first; + more shows the rest. A split applies whatever is locked, because the chip names both numbers. Typing Columns or Rows still keeps the block size and grows the quilt instead. When the quilt ends on a part block, the card says so.
On a shape grid the fields are Width, Height, Side length, Across and Down. Side length is the paper size for English paper piecing. Changing Across or Down resizes the quilt; the piece size stays.
Under the fields, Finished with borders is the larger number — the one batting, backing and binding are sized against. Borders sit outside the quilt's width and height.
Under Resize the whole quilt, 10% smaller and 10% larger scale the pieces, shapes and borders together, and stop at 1″ and 200″. If you bought this quilt's pattern, resizing it this way keeps the purchase. A different block arrangement makes it a new quilt; that is explained in the pattern section.
Set Up My Quilt For Me opens Configure my quilt. Describe the quilt in a sentence — hexagon EPP, on-point squares, a queen with sashing — or tap a preset chip. Chips fill the box; they do not apply by themselves. The plan is the proposal. Apply to the quilt is one undo step. You need to be signed in to send it. If sizing is locked, the dialog says so and offers this quilt’s pattern.
Preset sentences you can tap: “I want to design in EPP”, a queen of hexagons with a 3″ border, on-point squares at queen size, a tumbling-blocks baby quilt, a queen with 2″ sashing and a 3″ border, a throw with 1.5″ sashing, and “Remove the sashing and the borders”.
Fit to Pieces shrinks the quilt to the pieces already on it and moves them into the corner. Borders wrap the new size. It is disabled when the only pieces are frames.
Background is the design wall color behind the quilt, seen through gaps and through the parts a shape leaves out. It is a preview color, not fabric, so it never appears on the shopping list.
Grid
| Grid shape | What you get |
|---|---|
| Square | Rows and columns of square spaces. Sashing, borders and the Blocks group all expect this. |
| Hexagons | A honeycomb in staggered rows. Classic English paper piecing. |
| 60° Triangles | Equilateral triangles, every other one point-down. |
| Diamonds | Squares on point, meeting edge to edge. |
| Tumblers | Tumblers alternating end for end along each row. |
| Tumbling Blocks | Three diamond faces to a cube. |
| Half Hexagons | The honeycomb split point to point, each half its own piece. |
| Hexagons & Triangles | Hexagons set point to point, triangles in every gap. |
Switching away from Square clears the block, copied pieces and shapes loaded in Place, and turns sashing off. On a shape grid, Edges is Trim at the edge, which trims overhang to the quilt size, or Whole pieces only, which keeps pieces that sit fully on the quilt. Borders on a shape grid need the trimmed edge.
Layout, square grid only: Rectangular (plain rows and columns), Half-drop rows (every other row offset by half a block — triangles and tumbling blocks), Half-drop columns (a brick set). The control is disabled on a shape grid.
Rotation runs 0–359°, with stops at 0°, 30°, 45°, 60° and 90°. 45° is on point: squares turned to diamonds. Any rotation other than 0 trims edge spaces and turns sashing off.
Display: Show grid and Grid weight; Vertical center and Horizontal center (drafting lines, never on a saved picture); Piece outlines and Shape outlines, each with a weight. Grid weight is disabled when sashing is on and the frame is not pieced, because the content grid is hidden behind the sashing.
Sashing and borders
Sashing is strips between blocks. The section's Show / Hide turns it on. It is disabled on a shape grid and whenever the grid is rotated. Width starts at ¼″. Turning sashing on widens each space by that width. Fill is Solid (one continuous strip) or Squares (each gap becomes squares you can paint — square grid, Rectangular layout only). Color is disabled when Fill is Squares, because you paint those squares on the quilt. Cornerstones are the squares where the strips cross. They get their own shopping-list row only when their fabric differs from the sashing. Cornerstones are disabled when Fill is Squares.
Borders are rings around the outside. Add stacks another. Border 1 is the innermost. Each ring has a width, a Fill of Solid or Squares, and a color. Show / Hide needs at least one ring, and is blocked on an unclipped shape grid. Empty, the section says to add one to frame the quilt.
Overlays, quilting, controls
Overlays are tracing pictures. Add opens the library. They never appear in a saved picture, a post or a printed pattern. Per overlay: Show, See-through, Locked (clicks pass through to the quilt), Reframe / Done, Fit (fit the quilt, keeping aspect). Drag a corner to scale; Alt-drag stretches off proportion; Shift-drag snaps the angle. Arrows nudge while reframing, and Alt drops that step to 0.05″. Hold O to hide every overlay and see the design; release, or leave the window, and they return. It is a hold, not a toggle. Color from a picture appears when the grid is a shape grid: it fills spaces with the picture's colors, matched to A palette from the picture or My colors. Recolor filled spaces lets it change pieces you already placed; off, it fills only empty spaces. Colorize applies it. Adding an overlay asks for a subscription.
Quilting paints the top as a finished, quilted object — stitching and puff — without changing the design. It is a way of looking. It is not saved, and editing the design turns it off. It asks for a subscription. Preview quilting toggles it. Patterns: None, Straight, Diagonal, Crosshatch, Chevron, Waves, Clamshell, Stipple. Spacing is ½″ to 6″. Angle is 0–90° in steps of 5, and disabled for freeform patterns such as stipple. Thread color, thickness, and puffiness follow.
Controls sets how a color or fabric dragged from the palette lands. Which pieces change is This piece, In selection or All matches. An empty space becomes a new piece in the grid's shape. The faded preview is what will land before you release. Show the move and zoom pad puts a pad for zooming and moving the view on the design wall.
View, pinned at the bottom
- Ruler (U) — inch rulers on the top and left. Hidden until you buy this quilt's pattern or have a paid plan.
- Guides (G) — lines from the pointer to the rulers, with a measurement. The way to place a piece precisely with snap off.
- Sizes (M) — finished-size labels on the selected pieces, each edge or a circle's radius, plus the outer width and height of the selection. No seam allowance. On the free plan the pills read Demo. Real numbers come with this quilt's pattern ($4.99) or the Quilter plan. A locked quilt shows Locked.
- The keyboard icon opens Keyboard shortcuts, the same list as below.
- The panel icons show or hide the left and right panels.
Zoom, on the right of the dock: − and + step by 1.25, up to ten times actual size. Fit is F or ⌘0. The percentage is of life size; click it for actual size (⌘1), where an inch of quilt covers an inch of screen. Scroll pans. ⌘-scroll zooms around the pointer.
Colors, fabrics, shapes, blocks
The right panel's rail jumps to Colors, Fabrics, Shapes, Blocks, Suggest and Groups. Palette is open by default and contains the first four, under one search: “Search colors, fabrics, shapes and blocks”. Suggest, Groups and History start closed. Entering Place while every section is collapsed opens the Palette. The Blocks group hides on a shape grid, because those quilts are pieces, not square blocks.
The header states the swatch rule from above, in the words of the current tool. No fabric clears the fabric Place puts down. Blank clears the selection's fabric.
Colors
On this design lists solids already used (up to sixteen), photo fabrics on the quilt, and shapes on the quilt. Suggest matching colors builds a match grid from those. Try on a row or a column, Try it, New matches, Hide. A lock pin holds a color still. Try uses the selection if you have one, otherwise the whole quilt, and it does not remap photo fabrics.
Below that: the starter palette, Custom for a color that is not in the list, and My colors with + to save the current one. A click follows the swatch rule. A drag paints. Right-click: Copy color code. A saved color also offers Change color in a new tab. A suggested color offers Add to my colors. Shift plus left or right steps through swatches.
Fabrics
Photo fabrics from your stash. Free accounts keep ten. Solid colors are unlimited. With the palette search empty, you see your shortlist. Typing searches the library. Click and drag follow the same rule as colors. ⌘-left and ⌘-right step through fabrics. A locked fabric past the free allowance opens the paywall. Right-click: Edit fabric in new tab.
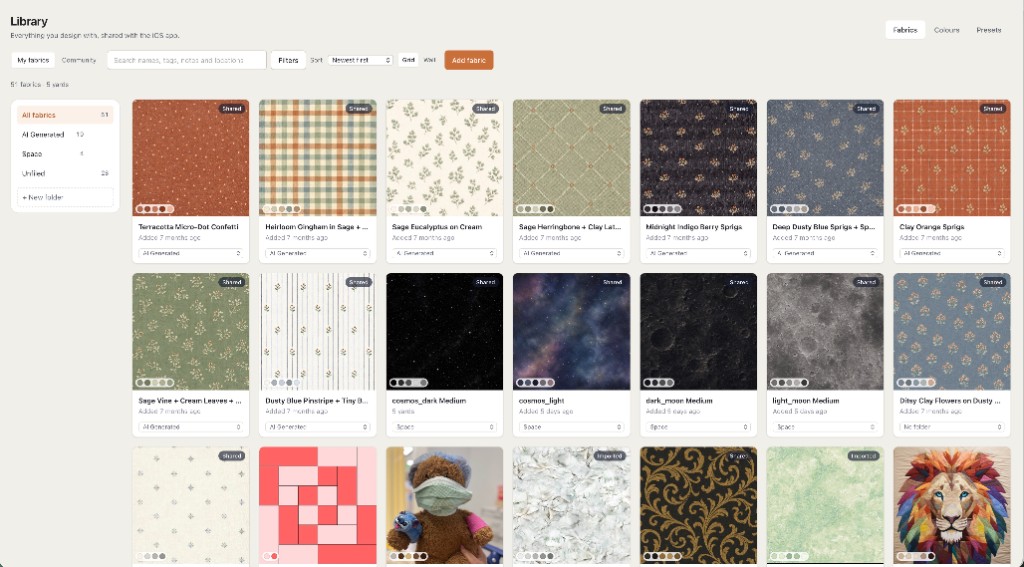
How large a print appears is crop, plus Stretch to fit or Repeat print, plus print scale. That job is also documented in fabric print scale. After you add a fabric in another tab, use the refresh button in the top bar. The designer does not watch the library live. The button is labeled Refresh colors, fabrics and shapes.
Shapes
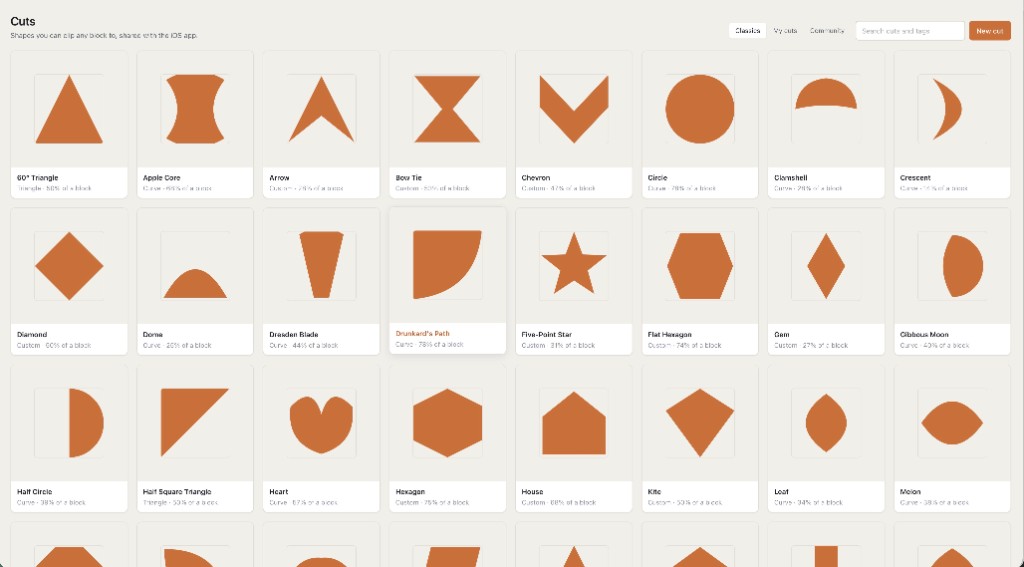
A shape is a piece's outline — a triangle, a curve, a hexagon. It trims the rectangle and records how much of the square the shape uses, which is how the calculator knows a half-square triangle is about half a square. Stacking two full squares to fake a pieced unit looks right and doubles the yardage. One piece per fabric, each with its own shape (two half-square triangles, say), is the version that measures. The long explanation is shapes and fabrics.
Tabs, when you are not looking inside one set of shapes: All, Classics, Mine, Community. Classics is remembered as the default until you change it. Search always looks through every source, whichever tab is showing. A click applies the shape to the selection, or loads it in Place. Shift-click adds it to, or takes it out of, the shapes Place combines in one space. No shape clears the shape from Place, or fills the selection with the grid shape. On a shape grid, only shapes that fit that grid are offered. Right-click: Edit shape in a new tab, or Copy to my library and edit.
C turns the shape inside the selection, or inside the next piece when Place is up, a quarter turn. ShiftC goes the other way.
Blocks
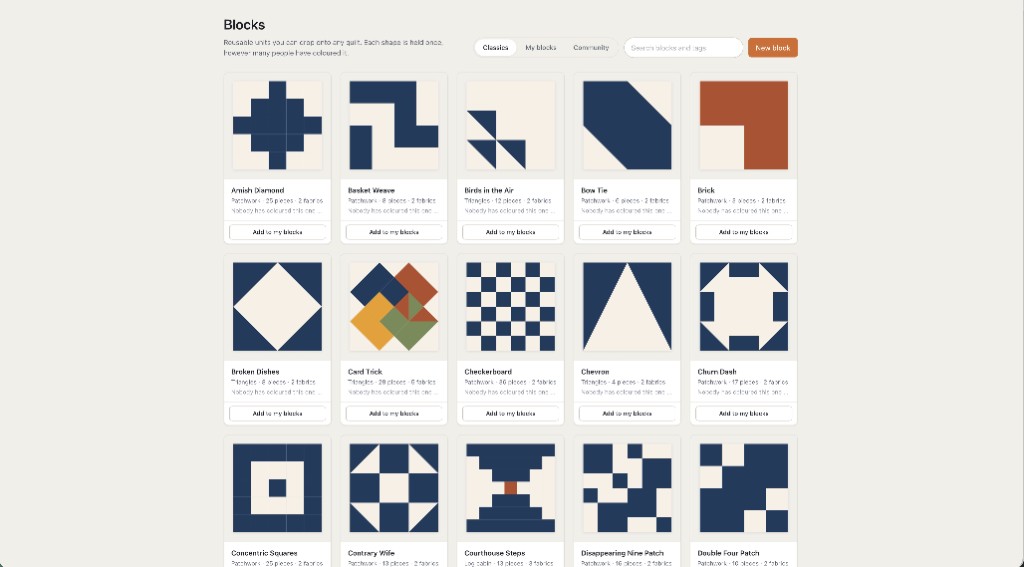
A block in this panel is a whole pieced block — Nine Patch, flying geese, Ohio Star — made of pieces, each with its own shape and color. The glossary explains block, piece and shape. Tabs: All, Classics, Mine, Community. Search looks through all of them.
- Select, with a space picked: the block replaces what is in that space and keeps its turn.
- Place, or nothing selected: the block is ready to place. Each click fills one space on the grid, and the hint names the block. The stamp explodes into ordinary pieces, which you can recolor one at a time afterwards.
- Drag a block onto the design wall to place it in one move.
Right-click: Edit block in new tab, or Copy to my library and edit.
Suggest
Two modes. One press is one undo step. Scope is the selection if any, otherwise the quilt.
Arrange places the colors and fabrics currently on show. The source line is Both, Fabrics or Colors, with a count. Styles:
- Scattered — every fabric spread evenly, touching blocks kept different.
- Gradient — corner to corner, like an ombré.
- Light & dark — alternates value so the piecing reads.
- Two-tone — two fabrics in a checkerboard.
- Random — pure chance.
The button is Suggest, then Shuffle again for Scattered, Light & dark and Random.
Recolor shifts solids already painted and leaves photo prints alone. Schemes: Pastel, Neon, Bright, Jewel, Muted, Vintage, Nature, Coastal, Autumn, Sunset, Monochrome. The button is Apply plus the scheme name. With nothing selected it can recolor grid fills as well as pieces.
This is separate from Suggest matching colors inside Colors, and separate from an overlay's Colorize.
Groups, history, shortlist
A group is a named selection that survives moving and recoloring its members. Group name and Save group need a selection. The default name is Group and a number. Rename in place. Select picks the members and switches to the Select tool; Shift-click adds them to the current selection. Update replaces the membership with whatever is selected now. Removing a group keeps the pieces.
History lists undo steps. Click a past or future row to jump there.
Shortlist, pinned at the bottom, narrows what the Palette and Suggest draw from. It does not strip colors already on the quilt out of Recolor. The menu can pin Design from a shop, Show everything, apply a catalog or Use one of your bundles, and under Mix and match filter Colors, Fabrics, Shapes and Blocks independently. Links from there open a new catalog, bundle, palette or set of shapes in another tab, so the quilt you are working on stays open.
Animations toggles the motion for stitching, the rotary cutter, a copy settling, and a delete fading. Turn it off if you want each edit to land without the flourish.
Finding pieces
The search in the top bar is about pieces already on this quilt, not the block library. Placeholder: “Search fabric, shape, rotation, size or group”. ⌘F focuses it.
- An empty box, with a selection, lists what that selection contains, so a second click narrows. Switch the scope to Whole quilt when you want every piece, or to This selection to stay inside it.
- Typing always searches the whole quilt.
- Facets are Fabric (including No fabric and Photo fabric), Color, Shape (including No shape), Rotation, Size and Group.
- Select all that match the current selection uses the toggles Fabric/color, Rotation and Shape.
- A row click selects those pieces, switches to Select, and clears the query. Shift-click adds them and keeps the pool, so you can narrow further. The hint says to Shift-click to add more. Enter activates the highlighted row; Shift+Enter adds.
- Done closes the list and keeps the selection.
An empty quilt says to add some pieces, then search.
Saving, variations, the free account
The top bar shows Unsaved changes, Saving…, All changes saved, or Save failed. ⌘S saves. The Save button's chevron is More ways to save:
- Save.
- Save as duplicate… — a new design, named “{title} (copy)” unless you change it. The original stays at its last save. Refused while you are in someone else's library.
- Save as variation — a sibling in this quilt's variation group. You continue in the new copy.
An unnamed quilt asks Name your quilt on first save. Save without a name is allowed. Signed-out visitors get Keep this quilt and your fabric totals (or the plan variant, if they asked for yardage first): create an account, or Not yet — keep designing.
While you are signed out, the current design is mirrored into this browser — one draft, not a library — and offered back if you return within about thirty days. A signed-in session that still has a very recent guest draft, typically because sign-in interrupted you, will offer to keep it. Saving to an account empties that drawer. Signed-in, dirty work is also mirrored on this device (up to twenty drafts, thirty days) until the cloud save succeeds. Reopening a quilt that has a newer local draft asks Unsaved changes on this device: Open saved version or Continue editing.
Free accounts keep one saved quilt and ten fabric photos. Solid colors are unlimited. The design wall is never locked. The wall appears when you try to keep a second quilt, upload an eleventh fabric photo, or use a subscription feature such as sharing. Re-saving the one quilt you already keep is always allowed. After a plan ends, the oldest remaining items stay open; newer ones stay stored until you subscribe again. Duplicate and variation each spend that one-quilt allowance, because each is its own saved quilt.
Variations sit beside the save status. A variation is a sibling copy — another colorway, a different border — that you can swap to without losing either. The pill shows a count once you have some. + Save first variation or + New variation creates one and continues in it. Switching saves unsaved work first. Compare needs two or more: the live card is the one you are editing; Edit this one on another card switches. The control is hidden while you are collaborating in someone else's library.
With a paid plan, saved quilts are on your iPhone, iPad and computer when you sign in to the same account. Library links from the designer open in a new tab so the quilt you are working on stays open.
Calculator, printable pattern, More
Designing the picture is free. Reading it as a sewing plan is the paid step. Two ways to pay, shown before you are charged:
- Just this quilt — buy this quilt's pattern ($4.99), a one-time purchase. On screen the button reads Buy this quilt’s pattern — $4.99. You can change fabrics and colors as often as you like, and make the whole quilt bigger or smaller. A different block arrangement, shape or set of borders makes it a new quilt. The version you bought stays available to download. Copies need their own purchase. Save the quilt before you buy, so the purchase belongs to your quilt.
- Quilter plan — monthly or yearly. Price and trial length are on the offer cards. Confirm at checkout. Terms are the legal copy.
If you change a quilt whose pattern you bought into a new arrangement, the purchase page says your purchased version is safe, and offers Download my purchased version alongside buying the new one. Keep designing for free returns you to the design wall. The free line on that page is the same allowance: one quilt and ten uploaded fabrics.
While a one-time pattern purchase is the reason you can see numbers, unsaved changes hide those numbers until the quilt is saved. A Quilter or Designer plan does not have that pause.
Fabric Calculator
The button is permanent on the top bar. It saves the design first if it has never been saved or still has unsaved edits, then opens the calculator in a new tab. The quilt you are working on stays open. Signed-out visitors are asked for an account before that.
On the design wall, Fabric you'll need shows four totals while you design, once sizing is readable: Piecing fabric, Backing, Binding, Batting, plus the finished size. Empty, it says to paint a square and the count starts. Every fabric and cut opens the complete cutting plan. The note under the card: yardage for each fabric and printable cutting charts are on the Quilter plan. When sizing is locked, the card shows the quilt's size and See the fabric amounts →, which opens the page to buy this quilt’s pattern or subscribe; its note names $4.99 for this quilt's pattern, or every quilt with Quilter.
On a narrow window the card starts folded. Pieces around the quilt and on spare design walls are left out. Overlaps on the quilt are counted twice.
More
The menu is things you reach for once a quilt is finished. Order on screen:
- Sell this pattern — saves, then opens the listing composer in a new tab. Disabled while it is checking, or with a reason if this design cannot be sold (you bought it, you imported it, you are not the owner, or you are collaborating). Once it is listed, the item becomes Edit your listing.
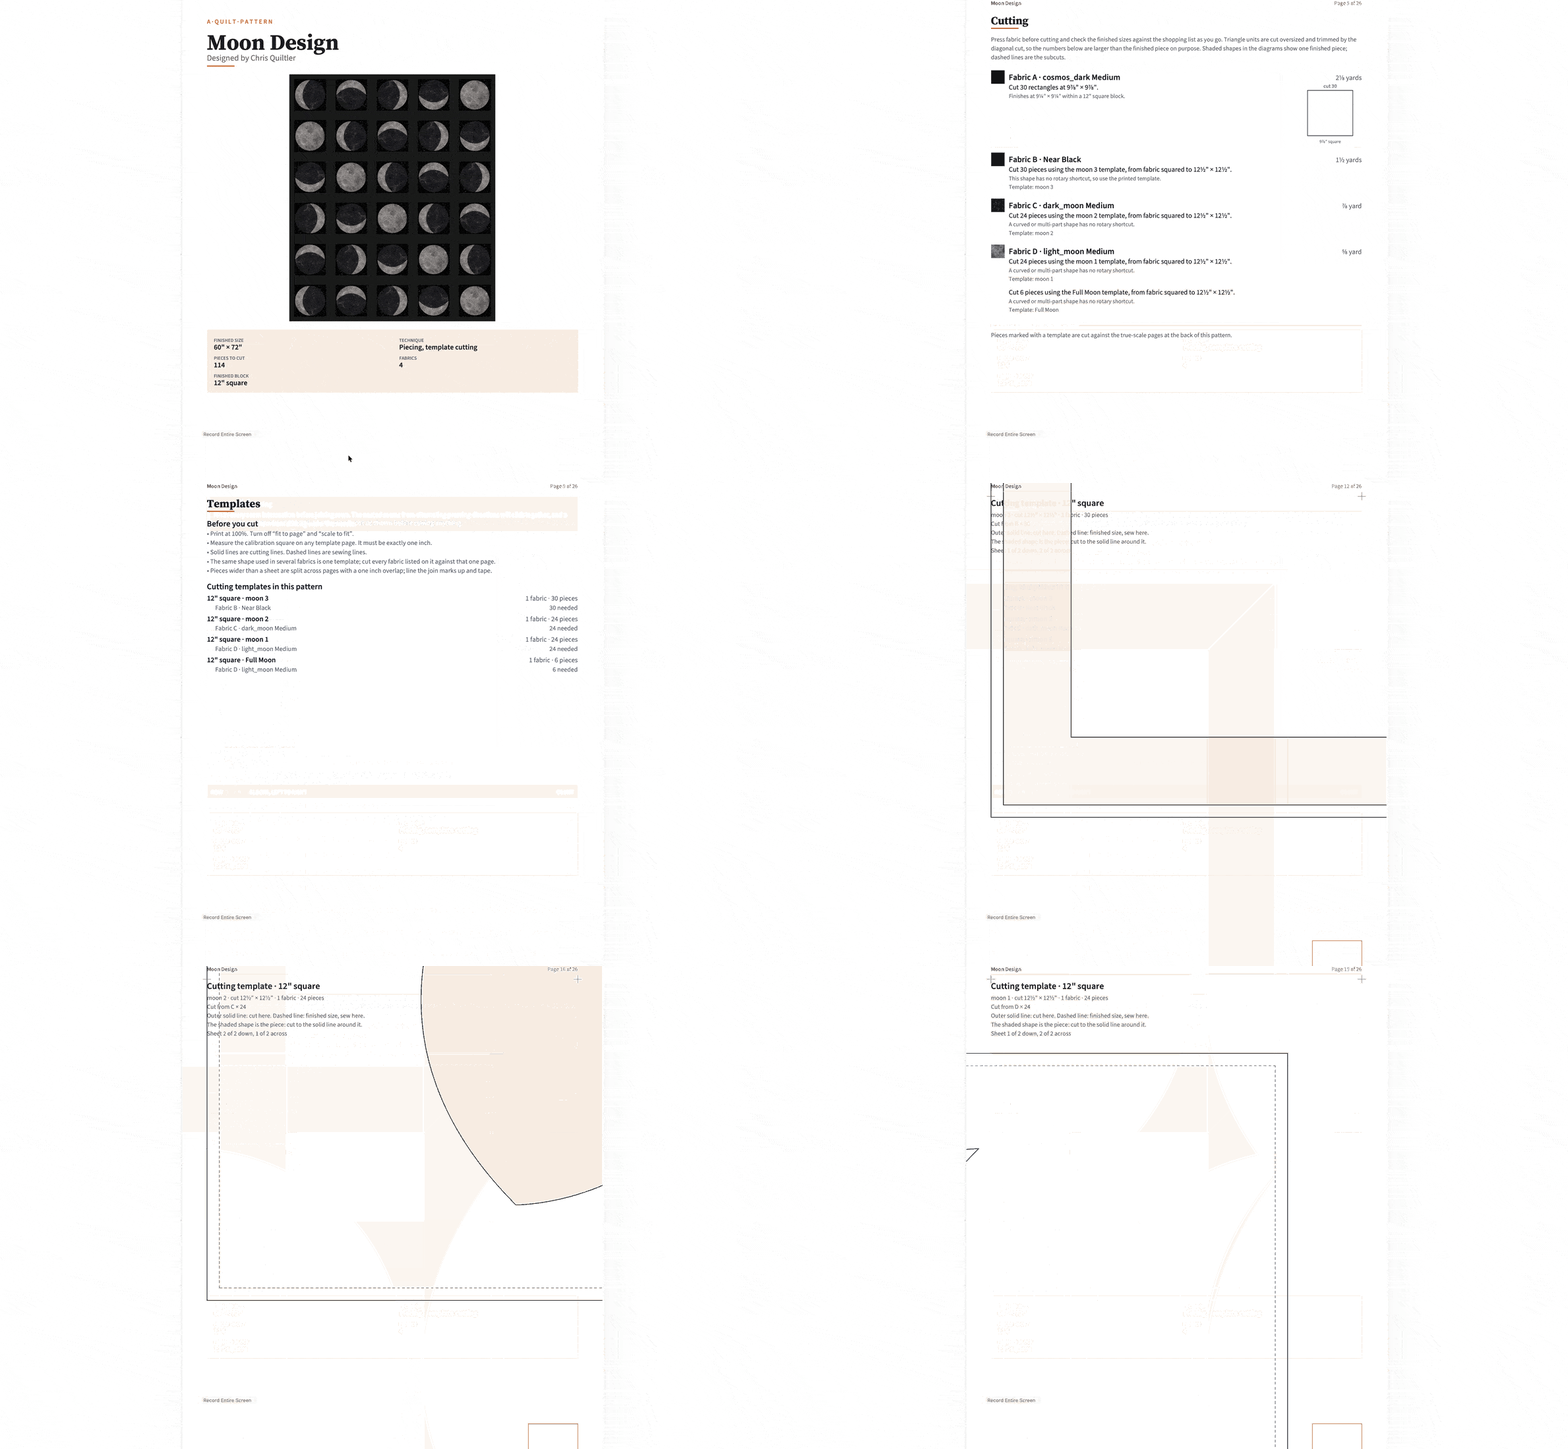
- Printable pattern — cutting & sewing — the sew-from-it PDF: cutting sizes, rotary instructions, assembly order, true-scale templates. You can style it before it prints. Saves first, then opens in a new tab. Downloading it needs this quilt’s pattern or a paid plan.
- Check overlapping pieces — selects overlaps and switches to Select, or reports that every piece sits beside its neighbors. A dot on the item means some exist. It does not move or delete them.
- Share & social content — the flyout below. Hover opens it with a mouse; a tap opens it on touch.
- Visualize this quilt — only on the Quiltler admin account, while scenes are still being tuned. It is not in the menu for everyone else.
- Take the tour — the first-run walkthrough, on demand.
- Designer guide — this page, in a new tab.
- Chat with us — support. If a reply is waiting, the label changes and a dot appears. The same chat is the bubble on the top bar.
Share & social content, in three groups:
- Share. Share to community (or Update community page if it is already public), View community page when one exists, Send to someone by email. These need a subscription, an account, and a design you are allowed to share. A purchased pattern and a live collaboration are blocked, and the menu says why.
- Pictures & video. Download image saves a picture; include a credit, or leave it off if you subscribe. With the paid-quilt offers, download asks you to be signed in and saved. Make video is a clip for Instagram, TikTok or YouTube Shorts. Progress & finished photos are photographs you take as you make the quilt; they need an account, and they appear on the community page and the pattern page.
- Making-of replays. Record how you build it records every change from here on. Moves on the spare design wall are left out. The item becomes Stop recording with an edit count, and the More button shows you are recording. Replay studio (or Load a recording… if you have none) opens the last tape. Make a build video from this quilt builds a making-of from the finished top — each unique block laid, colored, copied across — and asks how many squares across and down make one block. It is disabled while a live recording is running.
Keyboard
The full sheet is the keyboard icon at the bottom of the left panel. Every row there is a key the editor handles. This is that list, with the click behavior corrected to what the designer does.
| Key | Action |
|---|---|
| V | Select |
| B or A | Place |
| E | Erase |
| D | Draw |
| K | Rotary cutter. Press again to cycle rulers. |
| Enter | Close a drawn shape, or finalize every marked cut. |
| Esc | Unwind: menu, overlay, spare design wall move, half-drawn shape, cutter marks and picks, leave the tool, clear the selection. |
| ⌘S | Save |
| ⌘Z | Undo. Unmade cutter marks come off first. |
| Shift⌘Z or ⌘Y | Redo |
| ⌘A | Select all |
| ⌘F | Search this quilt |
| ⌘C ⌘X ⌘V ⌘D | Copy (loads Place), copy and delete, paste, duplicate |
| Delete | Delete the selection |
| Arrows | Nudge ¼″. Shift is 1″ vertically, and color-step horizontally. Alt is 0.05″. |
| R / ShiftR | Turn to the next 90° / 45° from 0° |
| H / ShiftH | Flip left-right / top-bottom |
| C / ShiftC | Turn the shape inside the piece |
| [ ] | Down one / Up one |
| Shift Left/Right | Step color swatches |
| ⌘ Left/Right | Step fabrics |
| AltShift 1–9 | Spread the next piece. 5 is every space. The rest are compass directions. |
| O held | Hide overlays until you release |
| F or ⌘0 | Fit the quilt to the window |
| ⌘1 | Actual size |
| ⌘+ ⌘− | Zoom in / out |
| U G M | Rulers / guides / size labels |
| Wheel / Space-drag | Pan. ⌘-wheel zooms. Space-arrows pan. |
Narrow windows
At about 1000 pixels wide the side panels become drawers. Both start closed. Opening the left closes the right, and the reverse. The scrim says Hide the side panels. Close them to work on the quilt; open the palette when a step asks for a color. The tool dock stacks the tools above the selection row a little before that breakpoint. The fabric card starts folded under about 760 pixels. The in-app tour, on a narrow window, leaves the palette shut until a step needs it.
Stuck in the designer? The chat bubble on the top bar reaches us. Account → Show tutorials again resets the in-app tours if you skipped them. If the vocabulary starts to slide, keep the studio glossary open. Quiltler will not open Electric Quilt project files; recreate the layout. The comparison, when you care, is EQ8 alternative.